
Not what it seams? Not seams, trims!
I started this chapter by skipping the seams part as I felt really lacking in inspiration or imagination.
However working through the trimmings etc helped me over this hump and it seems I can seam seams after all!
Trims
Each photograph shows a variety of samples which are each numbered according to the order in which they have been made. (I hope you can see the numbers well enough, I ran out of black pens, which seems incredible as I have a bit of an obsession for pens and mechanical pencils! A bit like shoes, I am always on the look out for the perfect fit!).
Lot no. 1 – 5.

1. I layered strips of fabric using straight stitch horizontally, spaced about 1cm apart and leaving tails of thread at the end. There are many possibilities for variations of this simple sample e.g. adding more strips of white stitching, adding alternate coloured threads, using different kinds of thread or using wavy lines are a few that spring to mind.
2. Here I changed the bobbin to one filled with embroidery thread and using zigzag stitching both types of thread can be seen on the bottom edge.
3. Similar to 2., except the bobbin thread is on the front of the sample. The strands from the start of each line of stitching have been folded down and sewn over to hold in place. As an extension to this I could also have separated the strands of embroidery thread.
It does say in the notes to make ‘interesting’ samples. As my creative juices brewed with the help of the above samples (which are okay but not bursting with imagination!), I had one of those ‘aha’ moments and made the following two samples.
4. I layered lots of threads between pieces of bondaweb and ironed them together. I then pulled away at the treads and edges. I sewed a layer of this over the front of black cotton and another layer behind which hangs below the cotton.
5. I sewed the bondaweb sample over black cotton topped this with a strip of white cotton and sewed over everything using a free-motion foot and black quilting thread.
Lot no 6 – 10.

6. String, metallic and cotton threads fringe the bottom of this sample . This could be adapted by folding the top layer of cloth down to reveal the other side where fibres are the trapped.
7. Tufts of the above fibres are sewn between two layers of fabric using close zigzag stitching and white cotton thread in the bobbin. The tension was tight here adding another dimension to the trim. I think I should have added another couple of rows of this to improve the overall look.
8.Wire edged, black organza ribbon was cut and frayed then sewn to the edge of white cloth. I sewed another strip of white under this to show the effect more clearly here. I think it looks like eyelashes. (Wish mine were this pretty!)
9. Bursting bubble wrap from my latest amazon purchase, I was inspired to make this sample. I padded the strip of cloth with wadding and manipulated the fabric to create ‘mounds’. I think it looks more like a bullet belt than bubble wrap, however a wider strip of cloth and sewing over the ‘mounds’ horizontally and vertically (or even diagonally) would change this!
10. Thinking about folds and manipulating fabric I pleated* this lovely strip of cotton. I love the way the colour varies from beginning to end. I Zigzagged the folds and altered the length and width of stitch as I went along.
(* A laugh out loud moment I have to share….Wordpress tells me this is a spelling mistake or used in the wrong context, it explains that ‘pleated’ is ‘a feature to make slacks look dorky’ ! )
Lot No. 11 – 12.

11. This sample is not what it was intended to be! I started off thinking I would make the edge of the fabric triangular. However when I cut it, it was too narrow in places and I had two strips the same so not wishing to waste them I layered them over heaps of fibres and a wider piece of cotton. The fibres have been teased into place showing a change in tone from black to white. Looking at it now I can see more possibilities to enhance this trim such as adding spots (possibly hand sewn french knots) to the sides where the fabric is quite plain.
12. The idea of using fabric and not fibres to create a decorative edge was still in my mind when I came up with this one. I had a few scraps of unused bondaweb which I added into the mix when I attached the square samples at an angle on the top and bottom edge of the fabric. Again I played around with the width and length of the stitching.
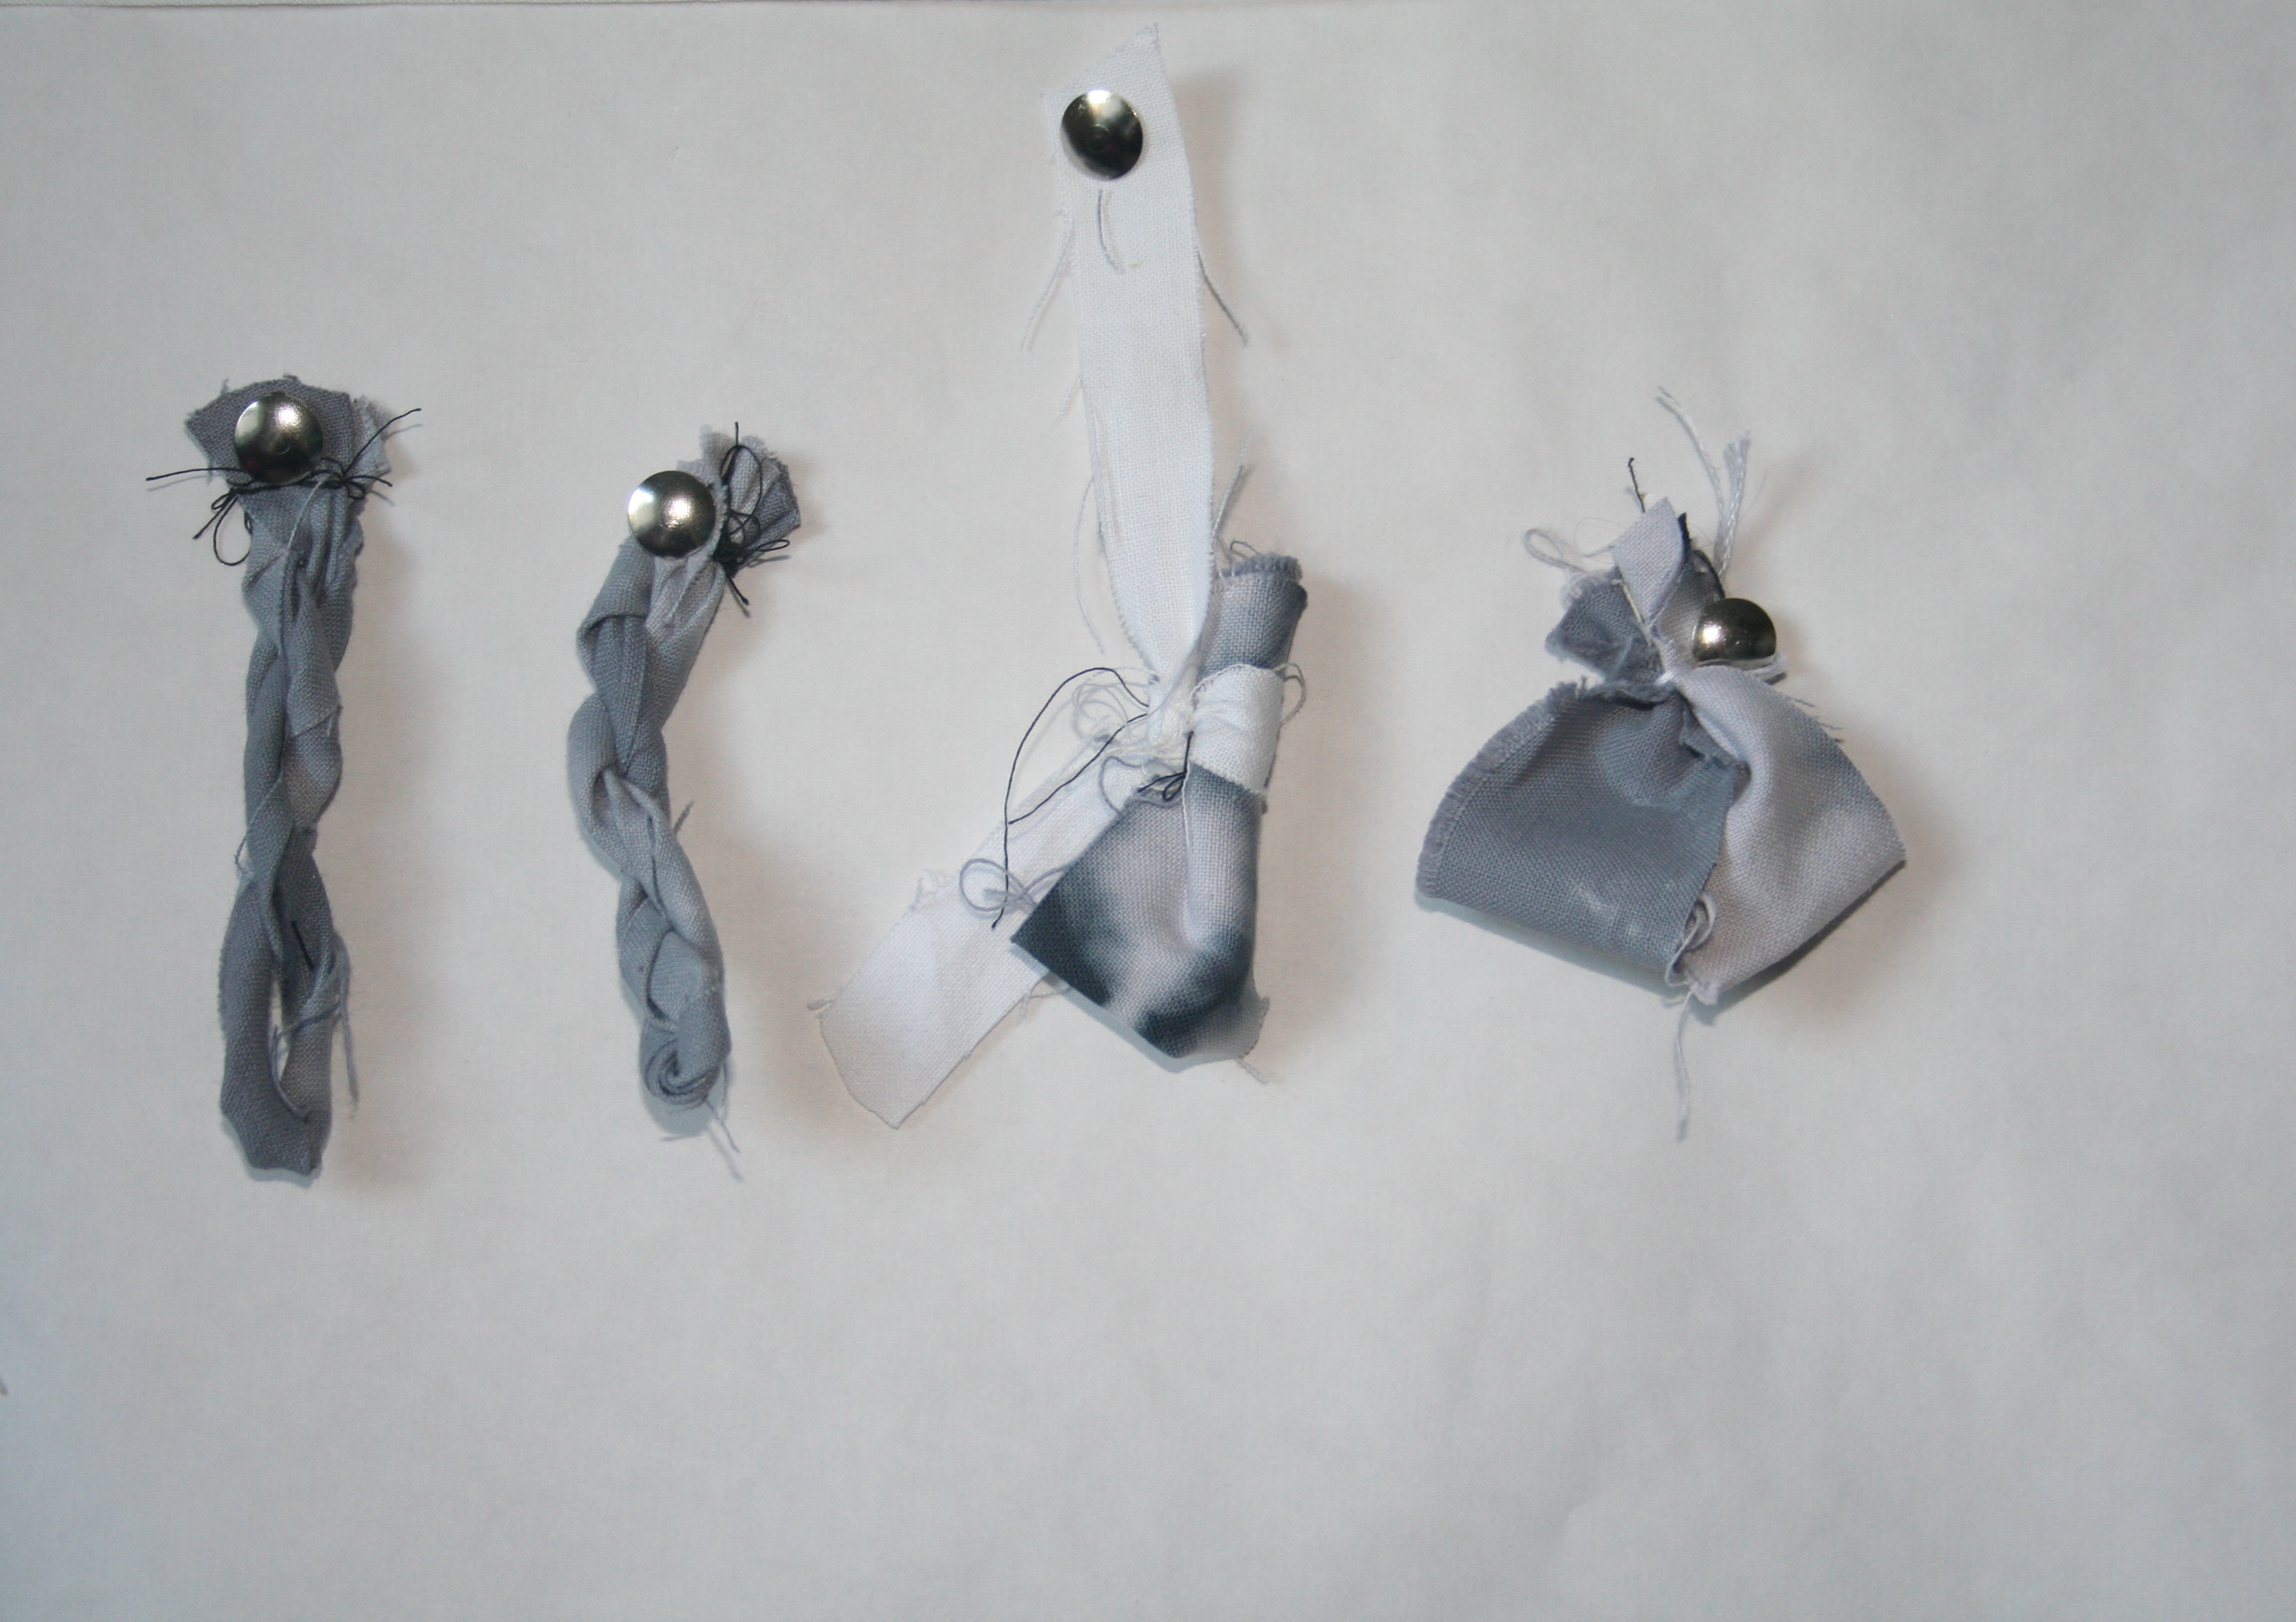
Cords
These samples are not numbered, (oops!) but I will refer to them from left to right, 1,2,3 etc.
A.

A1. A single strip of fabric twisted tightly and zigzagged over.
A2. Using 2 contrasting fabrics twisted individually then together before sewing as above.
A3. Three strips of fabric loosely twisted together and zigzagged flat.
A4. fibres twisted tightly and sewn over using zigzag stitch.
B.

B1. Single strip of fabric knotted tightly at uneven intervals.
B2. Three strips of fabric knotted together at regular intervals.
B3. Short strips of fabric knotted together.
C.

C1. Three strips of fabric pleated together.
c2. Fibres couched between two strips of fabric with ‘strays’ showing where the material has been trimmed away.
Toggles
D.

D1. Strips of fabric approximately 1.5 ” x 6”, glued, rolled and stitched in the centre.
D2. Strips 2” x 6” approximately, folded in half glued, rolled and tied with string.
D3. Fiddling with a piece of fabric while thinking about the next toggle design, I noted I had made a bow. 1” x 2” scraps folded in the same way and sewn in the centre to hold in place followed!
D4. Strips of cloth cut 6” long and cut so the top was narrower than the bottom. Rolled up and glued the edges are thinner than the centres. (This is similar to making paper beads!).
E.
E1, E2. Strips twisted and folded in half then sewn together at the top edge. 1. has been twisted tighter than 2. These could be used to secure the toggles, as decorations between seams (an aha moment here!), or as part of a trim.
E3. Cloth about 1” x 4” folded in half and secured with another strip of fabric.
E4. Similar to E3 except 2 strips have been used and separated after being sewn in place at the top.
It never fails to amaze me how I can see my thought processes developing from humble beginnings to more adventurous samples. I used to try really hard not to use the samples given but I am finding it can be really useful to work through them to help stimulate your own ideas if you are really stuck!
‘Seams” will follow shortly as I just need to sort an ‘aha’ sample before publishing!

Comments on: "DS.2, Ch. 8. Not What it Seams!" (14)
Yes, I agree completely that starting with the samples in the text book seems to get the creative juices flowing. After a while I too begin to see possibilities where before it was all confusion. Mind you sometimes it can be pretty frustrating trying to work out how the samples were created. I refer a lot to my rather large collection of textile books as well! :0 Love your samples, and especially loved following your progression!
I also have a rather well stocked library of textile books which I sometimes forget to look at! You are so kind, I love your comments Edith, thank you so much.
Yes, the books are great, aren’t they? Like candy for children! 🙂
Couldn’t put it better myself, I just got a pile of delightful books as presents… better than chocolate any day … or is that going too far?
How about both?!! 🙂
Presents? A birthday perhaps? Lucky you! 🙂 So what did you get? Any particular recommendations?
Both? perfect, why not! Birthday bundle from husband included;
The Art of embroidery by francoise tellier-lou loumange is a stunning book, full of quality photographs and not heavy on text. The Elements of Design by Loan Oei and Cecile De Kegel, beautifully put together, no text just great photography, would really recommend these two as well as machine stitch perspectives by Alice Kettle and Jane Mckeating, which is full of contributions from textile artists. I love the man, he listens to me when I say ” you will get ideas for my birthday on my amazon wish list!” when he gets it right I can forgive him the times he clearly wasn’t listening. What books would you recommend?
Lucky you to have someone so tuned into your interests! 🙂 Just keep that wish list alive!!!
I have all the books you mention here, and love them too. Another good one is Alice Kettle’s Hand Stitch..
Other recommendations would include’Creating Sketchbooks for Embroiderers + Textile Artists’ by Kay Greenlees (an absolute ‘must-have’); The Encyclopedia of Machine Embroidery by Val Holmes; and Stitch and Structure by Jean Draper.
Mmmm, perhaps we should start a post on the Distant Stitch FB page to see everyone’s top 3 or 5 favourite books! 🙂
Happy birthday!
I don’t have those books but will have a look and possibly add them to my wish list !
It’s good to share!
Lovely, lovely samples Elaine! Sample 12 is my personal favourite but they’re all creative and wonderful. ‘Pleated’? Try telling that to a man in a kilt tossing a caber!
I always begin a chapter feeling underwhelmed by lack of independent inspiration, and I also find it increadibly helpful to work through the examples in the course notes first, then take tentative steps into my own ideas. Your samples in this chapter are really confident and original, and very inventive.
I’m a textile bibliophile too. I have two stacks about a foot high on the coffee table, and always one sitting on my lap in the evenings. My favourites at the moment are ‘Drawn to Stitch’ by Gwen Hedley, ‘The Found Object in Textile Art’ by Cas Holmes, and a couple of designey ones by Sandra Meech, plus a couple of older Jan Beaney ones for the samplers (yes, Edith, if you are reading Elaine’s blog, I’m still doing them). I also bought ‘The Sketchbook Project World Tour’ when I was in Melbourne at the weekend – think I’ll post about it on the facebook page.
Hi Judith thank you for your lovely comments, and to anyone out there, please feel free to use my ideas as a stimulus for your own if you feel in any way inspired by them, I would take it as a compliment. I have some of the books you named and have to confess have not opened them yet! But I am about to now! The Sketchbook one sounds very interesting, sharing on fb sounds like a good idea. I hope your ds work is going well. What are you working on at the moment?
It’s good to know that we all feel the same sense of trepidation when we start each new chapter! I’m way behind you two, still working on my fabric samples of seminole patchwork. Almost afraid to say it, but think I’m enjoying this better than the log cabin…though i should probably wait to make any pronouncements until the chapter is finished!! 🙂
I have the books you mention as well Judith, and like you I love those ones too! Alice Fox is publishing one soon and I can’t wait to see it! And yes, the Beaney and Littlejohn books are all excellent and my go-to resources for all hand stitching, especially ‘Stitch Magic’. Also like their dvds.
Haven’t heard though of your sketchbook title. Will check that out now. Which brings me to ask… what are your favourite ‘how to sketch’ books, or just books about sketching!
Loving this chat; it’s almost like having our own little meetings! 🙂
I enjoyed the seminole patches more than the log cabin too, piecing them just made sense to me and I have used this technique in other work I am doing. I didn’t mention the sketch book I got for bday. It’s a handy little size and lightweight for carrying about. ‘The urban sketching handbook, People and motion” . I think it is possibly part of a series of sketch books but I haven’t checked that out so could be wrong. I have lots of other sketch books but I have not looked at them for quite some time. I have added some of the books you have both mentioned on to my wish list, and whilst on Amazon I came across a book about pin looms which were popular during the 40’s for weaving little squares for patchwork etc. This looks easy and quick to do, possibly yet another craft I will start although I don’t really need the distraction!
Thank you for giving me access to your lovely reading/ writing blog, I have read or started a couple of the books on your list. Are you going to comment after you have read them? Do you have a distant stitch blog too? That’s what I thought I was being taken to ;0) . I am sure your work is wonderful. I have been doing this unit for a very, very long time so don’t concern yourself about not being at the same point. Judith’s work is amazing and flying through everything ! It is great to have this chat going on!
Here’s the link to my blog : http://textilejournaling.blogspot.ie/
Just getting back to the work today! Will catch up later this evening after I try and complete chapter 7!!!!